Monday, November 29, 2010

Crispy Crust Pumpkin Pie

This Thanksgiving was a quiet day for the Hub and me. But, side benefit, it seemed I could do nothing wrong while cooking. The roast chicken was yummy, and I think the stuffing might have been my best ever. That, along with mashed potatoes, gravy, and fruit salad, made up our meal. I know, there wasn't a green thing on the menu, if you discount the grapes in the ambrosia.

Oh, and for dessert we had pumpkin pie, the subject of this post.

I've long hated the way the bottom crust on pumpkin pie so often turns out soggy. Seems I could never truly get it done; it was just bleahh! So last Thanksgiving I tooled around the internet until I found a lovely article at the Pittsburgh Post Gazette, which paper I must say, has some of the best recipes I've ever found. (Perhaps I think that because I spent ten years of my youth in Pittsburgh and found a number of recipes in that newspaper that I still treasure.)


The Post Gazette article agrees with my contention that keeping the crust crisp is the biggest challenge of making pumpkin pie. They say the problem is caused by proteins in the milk and eggs, which denature and exude water.

So now we know what the problem is, the question becomes how do we fix it?

What it boils down to is baking the shell first--yes, I know, you already do that--then making sure the filling is warm when you pour it into the crust.

Here are details from the article?

"Preheat the oven to 325 degrees. (Some recipes bake for a short time at a high temperature, but that can cause the pastry to shrink.) Use your usual pie pastry recipe, transfer it to the pan, fluting the rim higher than usual to contain the filling. Put the raw shell in the freezer for 15 minutes to firm it up. (I think this helped immensely.) Put a piece of foil directly onto the cold pie shell pressing it to conform to the shape, and pour in the pie weights or beans. (I use weights.) Bake the shell for 20 to 25 minutes. Remove the weights or beans and continue baking until the crust is light golden brown and cooked through, another 15 minutes or more. Let cool on a rack.

"When ready to bake the pie, preheat the oven to 350 degrees. In a large bowl, combine room temperature filling ingredients (pumpkin, eggs, sugar and spices) and mix well. Heat milk or cream until it is hot but not boiling. Slowly whisk the heated milk into the pumpkin mixture. It should register about 100 degrees on a digital thermometer, no more, just beyond lukewarm. (Poke your finger in to take both a temperature reading and a taste.)

"Pour the filling into the baked pie shell and bake about 30 to 40 minutes depending on your oven. The pie is done when a knife, inserted off-center into the pie, comes out clean. (This was new to me. I've always stuck a toothpick in the middle of the pie.) The center of the pie will continue to cook after the pie is removed from the oven. Do not overbake.

"The pie crust will stay crisp until the pie is gone, even the next day. That is, if it lasts until the next day."

I have to say it actually does stay crisp that long, longer actually cuz between us it takes several days to eat a whole pie.

As a sidenote, I make the filling with Splenda. I'm not that crazy about using artificial sweeteners, but I also can't use sugar, and I do like pumpkin pie this time of year. So sue me. ;^)
I'll be pulling this recipe back out again come Christmas time. It's a given that we have pumpkin pie both holidays. But give it a try, whydoncha? It really does work.

I'm linking to Hope Studio's Tutorial Tuesday.

Wednesday, November 17, 2010

Button Icicle Tutorial


The other day I was in a hurry to find a little thank you gift to include with an item someone had bought from one of my Etsy shops. Quickest thing I could think of was to whip up a small button icicle ornament. I didn't take a pic of that one, but thought I'd create a tutorial to show how I make these ornaments. They're fast and easy.


Some in the pic above were made with vintage plastic buttons. The one I'm showing is vintage MOP (mother-of-pearl).


Materials needed:

Heavy duty thread/string (I use crochet cotton; I didn't care for waxed linen.)
Buttons of varying sizes
Scissors
Sheer Ribbon
Some kind of dangle--I'll be using a bead charm on this one.


First lay out your buttons in diminishing size. I try to do two of each size. The quick thank you I made only had about eight smaller buttons, but I usually do fourteen to sixteen in these larger ones.


Cut a cord at least six inches longer than the length of your buttons.


Tie a loop in one end of the cord; trim the short end. (If you're a jewelry maker, a crimp bead would work well here. I've made some using such, but am not sure where I stashed those beads so I had to improvise!)


Begin stringing the buttons. I don't use a needle since the size of the holes vary and a needle with a hole large enough to thread the crochet cotton doesn't always fit into the smallest button.


Be sure to string the buttons back to front. (I'm sure you already knew that, but believe me I had to work it out.)


Continue stringing buttons, laying back sides together.


Once all buttons are strung, tie dangle tightly onto the bottom (or use a crimp bead). Here you can get creative. I've used dangles from old earrings, old pendants, the beads from beaded fringe, plastic beads from Walmart. Practically anything goes.


If you tied rather than crimped the dangle on, thread the tied end back through the bottom few buttons and tie off. Clip the end.


Loop a length of ribbon through the beginning thread loop.


Tighten.


The one I showed in the tutorial is the third from the left.

While I'm at it, I'd like to show another ornament I made yesterday--not that it took that long to make. In the early '90s, while garage sale-ing with my sis Betty, I found this hand-painted pendant. I meant to give it to my mother but never got around to it. Never found anything else to do with it either and it's been stashed in a button box ever since. I think the painting is nicely done so I tied a ribbon on, sewed on a button and Voila!


Truly, I think it makes a better ornament than pendant. What think you?

I'm linking to Hope Studio's Tutorial Tuesday.


That's all for today. Take care, y'all.

Friday, November 12, 2010

Shop Additions

I will get past this dearth of posts eventually. That's a promise.

Lots of things happening here. In my last post, I mentioned Hub had been in the hospital. What we feared was heart-related turned out to be pneumonia, although while in hospital the docs found his stenotic (narrowed) valve has narrowed even further. Which means heart surgery. (This is probably TMI, but valve narrowing has a completely different cause than artery blockage. As it was explained to me, or rather as I understood what was explained to me, valve blockage is similar to scar tissue, caused by a number of things, one of them being strep throat. Who'da thunk?) He doesn't see the surgeon until next week, had to have time to completely get past the pneumonia. So we're in a holding mode here.

Enough about that. Since I've hardly done anything creative in the past month, I thought I'd share with you some of the things I recently listed in my shops.
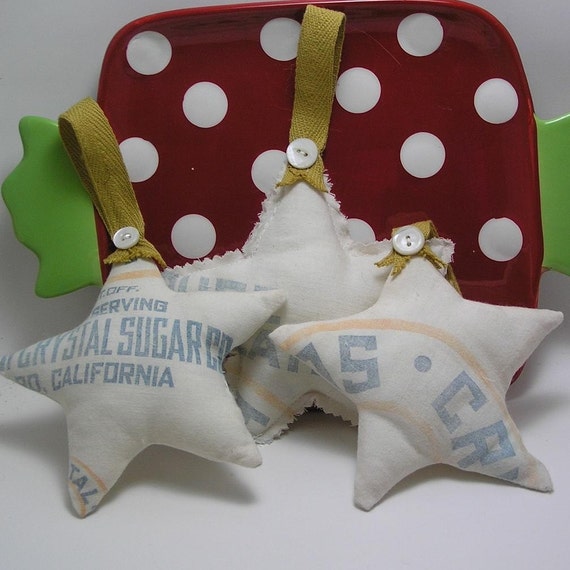
I found several old sugar sacks at a garage sale a couple of years ago. Couldn't think what to do with them; they were too small and the graphics went the wrong way to make even a small pillow. So I cut one up for Christmas ornaments.

I love these next brooches, picked them up for next to nothing. I've listed all six in the vintage shop.


These are actually a lot larger than the photo makes them appear. The scarved lady--doncha love her!--is 2.5 inches long. (As a side note, the pink marbled stone brooch is much prettier than it looks here.)


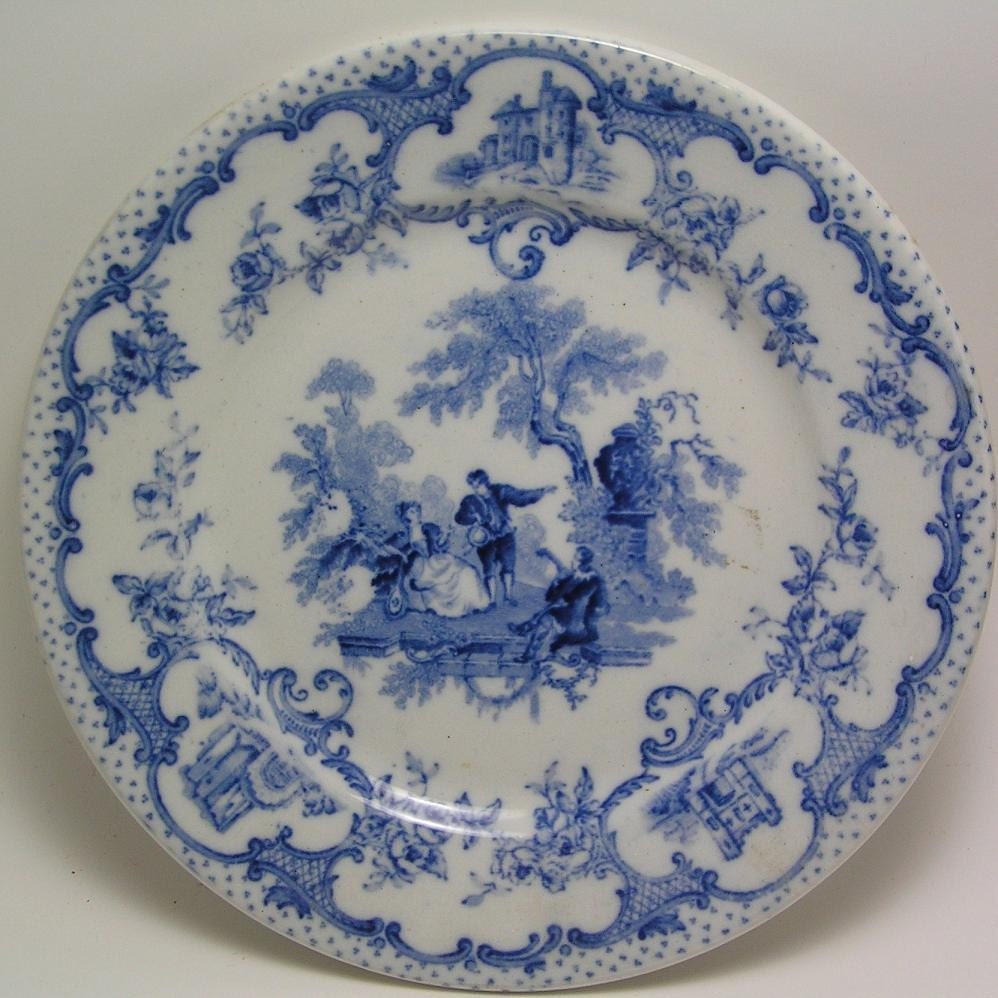
Those who love blue and white--and who doesn't?--might appreciate this dessert plate by Mason in a pattern called Romantic. It's hard to tell from the mark exactly when it was made, but it was at least before mid-last century.


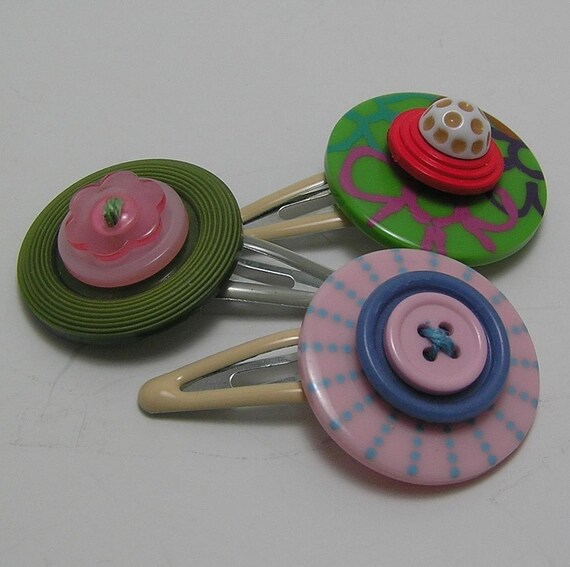
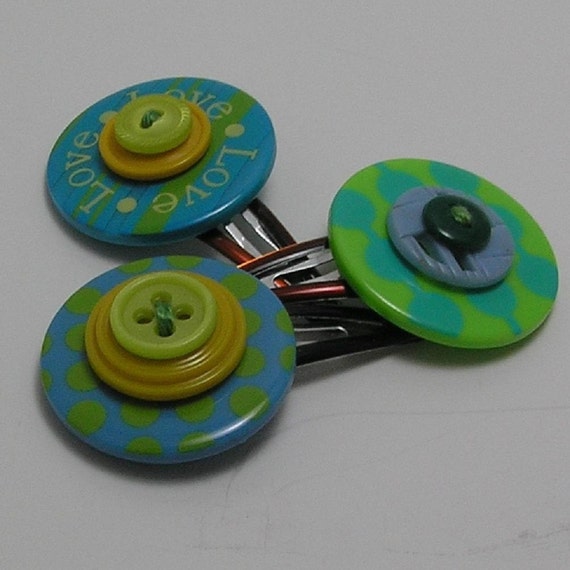
Another thing I've been working on is button hair clips.


I've put together a mixture of old and new buttons and attached them to hair clips. Personally, I think they're gorgeous!


Love the colors of these!

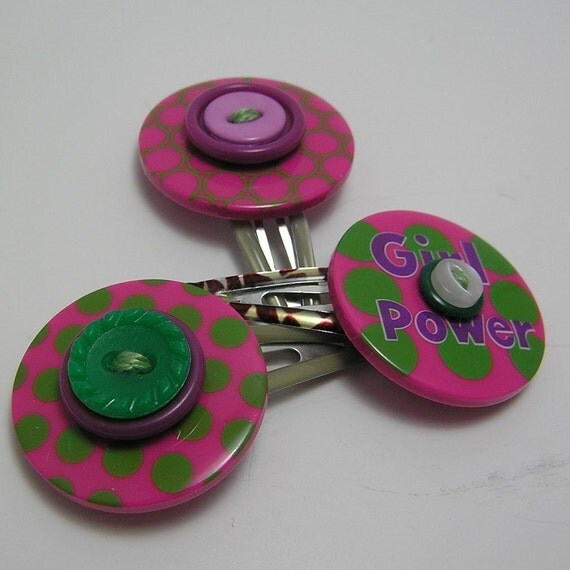
And these.

But I think of all of them, these are my faves.

Hope you've enjoyed the pictures. I am working on a few more projects: new pillows for my living room sofa, a new euro-sham for the master bedroom--we traded our queen bed for a king--and I just finished a new bedskirt for my sis. I'll get photos of them in situ in the next few days and will post then.

'Til then, y'all take care.

Sunday, October 17, 2010

My To-Do List

I started this post a while back, working on the Hub's teeny-tiny laptop while Gertie was in the 'puter hospital. I didn't get far. My hands just weren't made to work with something that small.(And no, I don't use a Smart phone.)

Then the Hub wound up in the real hospital, and all thoughts of blogging went out of my head.

He's out now and doing well...and so is Gertie. So here's the post I didn't post before.

These are projects/ideas I've picked up over the last month or so with the idea of one of these days....


Scrappy roses are all over the 'net. These lovelies--and a tutorial--are from Little Birdie Secrets.


Aren't these patch pillows gorgeous? Check them out at C.R.A.F.T. here.


Another patch pillow. If, like me, you're interested in trying one, here's a tutorial on embroidery stitches from the Caron Collection.


I think I've shown these lovely covered books before from Drab to Fab, but I'm wanting to do a few for my sis who's redoing her master bedroom so this is to remind me where to find the directions.


For a whimsical take on all the recent book page crafts, check out these clothes pins by One Cheap B*tch.


Cool scrapbook paper pumpkins from make mine lime.


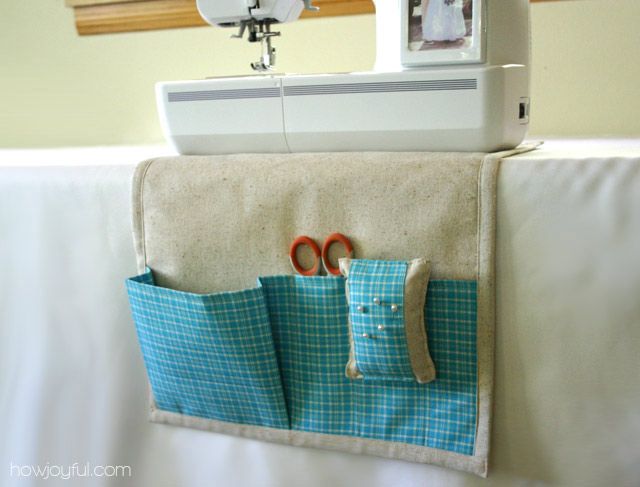
I'm always looking for ways to organize my sewing space. Love this Sewing Caddy from How Joyful.


Here's another tute for covered books from Murphy's Law, Only Worse.


Scrappy roses extraordinaire in this Recycled Roses Pillow from Alisa Burke.


How about this machine applique from Made at Greenlodge? Tute here.


Another machine applique from Jane of All Crafts.


Gotta love these covered buttons made from embroidery scraps. For the above button, Julie used a scrap of a vintage embroidered handkerchief. Find details at The Adventures of Blue Girl.


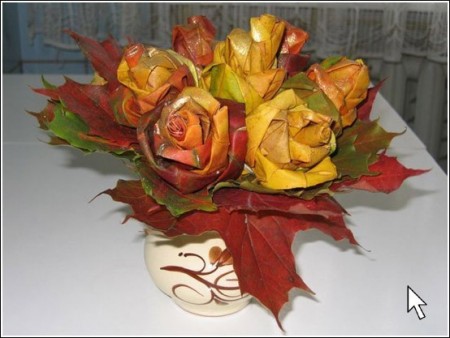
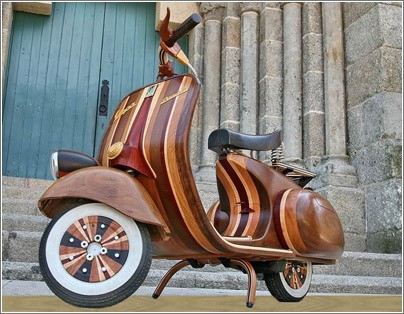
Aren't these maple-leaf roses wonderful? The blog Lobzik is written in Russian, but the pictures are self-explanatory. Find the tute here. (That link should take you to the Google translated page.) Take a tour around her site; there are some lovely items there, such as this


Isn't it fabulous? Check out more pics here.

.
How about this button sewn on with bullion rose buds? Is that cool or what? There's no tute, though she does give tips. If you know how to do the bullion stitch, easy peasy. If not, you can find directions here. The pic above comes from this site.

That's all for now. Take care, y'all

Wednesday, September 29, 2010

Catching Up

It's been awhile since my last post, and I plead the Fifth!

Aside from not feeling so all right, I've been steady working on cleaning my studio. I know I always say I'm working on it, and so far I haven't managed. This time, since I have a big project coming up, I tore the whole blinkin' thing apart and started anew, beginning by wrapping my fabric yardage around comic book boards so I could store them like books.

(Whoops! Guess DCW didn't want me posting pics of the comic book boards. Still, if you click on the link below, it'll take you to the site where there is a pic. Thanks, Daisy, for bringing this to my attention.)

I only bought a hundred, couldn't imagine needing more, but I'm running really low on them now. They're only about 10 bucks for a hundred here, though shipping doubles the cost. (Find the tutorial for fabric wrapping here.)


When I took the above photo, I'd only done three shelves. The basket on the bottom left has now been redone as well with all my scrap fabrics rolled into tidy parcels and secured ala Just Something I Made. She shares a PDF Download for labels to wrap around cigar-wrapped remnants here.

I'll show more pics of my cabinet once I complete the arranging.

The other thing I did while I was not posting was this new tea cozy.


I made it of a lovely linen fabric I found at our library thrift store a while back.

I've had a good old time testing fiber content of this and other fabrics I've picked up here and there. Did you know that if you leave a piece of 100% wool in bleach for a while it will disappear? Silk will disappear as well but takes longer. Other fibers need the burn test to determine content. You can use the burn test on silk and wool as well, but since my smeller's not the greatest, I find the bleach test more conclusive. Just know that petroleum products become molten plastic.

So with that and my sincerest apologies for my inattention to the blog, I'll sign off now. Take care, y'all.

Monday, September 6, 2010

A Few Finished Projects--Finally

For a while now, I've been working on some projects that seemed to take forever. First, I've been making a couple of tea cozies as a gift for a friend. Both her large for-company-only and her small daily-usage teapots are Meissen Blue Onion pattern. I wanted to make cozies for each.

The large was relatively easy, once I worked out the design. I used white linen as the outer fabric and embroidered the word tea on the front.


The trim on the bottom came from Etsy, a nice woven blue onion-patterned trim.


The lining also came from Etsy. It's a remnant of a vintage tablecloth, which I machine-quilted onto a piece of felted wool blanket for heat retention.

This one I'm liking.

The hardest was the small cozy, and I'm still not happy with it. First I wanted to use the same white linen, but as it's very easy to drip tea on a bachelor tea cozy, I nixed that. Then I tried a fabric I had only a small remnant of, and I cut it wrong! So I decided to do a patchwork with what I could salvage from the messed-up fabric and another piece I had. That took me in an entirely different direction than the blue and white I intended.


See the teapots on the blue and white stripe? That was my original messed-up fabric. Since there was a great deal of pink in the teapots and cups depicted on the fabric, I originally intended to use a pink for just the liner, but instead used it as alternating patches on the front as well. Now I'm thinking the pink has taken over, becoming the dominant fabric.

I've made bachelor cozies, with the handle and spout free, before and had no problem, but since I was using lightweight fabrics for both the outer and inner sections, I decided to add felted wool to make sure I had heat retention capability. I got a bit zealous though, putting it on both the outer and inner fabrics. It makes it seem more of a down-filled teapot jacket as opposed to a nice dressy woolen teapot coat.


I'm going to send it to Kathy as is and hope she can use it. Maybe I'll make another and send later.

The other project I've had going on lately was for my sister Daisy.


This is the fabric she used for her dining room drapes, nice and tailored-looking. And this is what I made for her wall.


Again, I'm not as happy about this as I wish I were. Since I had no fabric to go with her drapes, and since I'm trying to use things in my stash, I opted for wallpaper, which was in my stash. This picture makes it look as if it needs batting underneath. 'Cept there ain't no way I'm gonna start all over on this one! (Sorry, Daisy.)

I'm hoping to get both of these in the mail tomorrow. Kathy doesn't read the blog so it should still be a surprise for her when she gets it. Daisy does, sporadically, which makes it a coin-toss as to whether she'll see it online first.

So what have you been working on lately? Does it take y'all as long to finish projects as it does me? Do you have long lists of things you want to get done...one of these days? (I'm thinking my next project--once I get my studio back into a shape where I can actually work on something--is going to be the pillow with the flower I blogged about last.)

Hope you all had a lovely Labor Day! Ta.

Wednesday, September 1, 2010

Pillow Design Quandry

First, before I get into the pillow design question, I want to note that I've decided to use my blog as a memory jogger. After spending what seemed like hours this morning searching for a design I recently saw, storing the images here seems the easiest way for me to find things.

So now for the question--I picked up a pillow the other day from the thrift store, solely for the down insert. Both the cover and the insert are in perfect condition, hardly used, but it's a banana color, not so great for most people's decor, definitely not for mine. But it's a Crate and Barrel pillow, not expensive but still not something you'd pick up at the dollar store. So I decided to find a way to foof it up, yellow and all.

This next pillow was on Cluck Cluck Sew's blog and was also featured on Someday Crafts.


I'm thinking the bright yellow Crate and Barrel pillow would look cool with a flower like this. (Tutorial found here.)

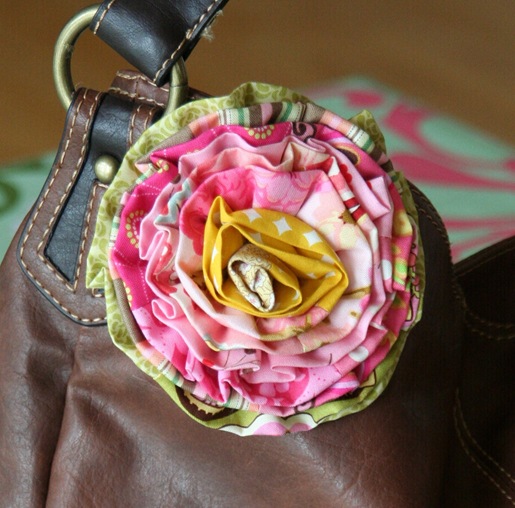
Using the same process, different dimensions, she also made this flower brooch. (Tute here.) 


That would look terrific on a bag. And isn't it cool that it's using scraps of fabric? I'm all for using what I already have.

Another design I'm considering for the front of the pillow is this one from Michele Made Me. She calls it Teddy Bear Swim Needle and Hook Book.


Pretty cool, innit? Tute can be found here. Whether or not I use this design for the pillow, I certainly mean to make the needlebook. I do love me some needlebooks!


I don't do that much crochet anymore, but I'm thinking the inside could be adapted to hold tools I'm always misplacing, i.e. my sewing gauge, bodkins, seam rippers. It could be made to be very functional, methinks.


My last idea for the pillow transformation is to translate a rainbow in buttons. How cool is this picture? I'd love to use that as an inspiration but I'm afraid it would take more buttons than even I have.

But a simple arc of buttons in purple, blue, green, yellow, orange and red shouldn't take that many, should it?

So those are my options. I'm leaning toward the flower because 1) I have some pretty cool scraps of fabric and 2) it seems fairly easy. Still, I'd love feedback on which design you think I should choose. All comments appreciated, my friends!